Most users have a mobile phone and a computer to meet their day-to-day technology needs. But if you happen to be an Android and a Windows user, you might not be happy with the current situation of both platforms. There are very fewer options to keep these devices connected and in sync. But the tool that we have covered here in this post aims to bring these devices a little closer by letting you control your Android device with your computer’s mouse and keyboard. The utility is called DeskDock.
DeskDock lets you control Android phone from PC
As the name suggests, the tool is primarily for users who stay mostly at their desks. And users who would love to control their Android tablets and phones from their computers. What DeskDock basically does is let you use your computer’s mouse or trackpad to navigate through your Android phone. And this happens so seamlessly that you wouldn’t even notice anything odd about it. Just drag your mouse pointer out of your computer screen and the pointer will just appear on your Android device.

How to set up DeskDock on Windows
DeskDock is available for most of the platforms and Windows happen to be one of them. Setting up is not tricky, it just involves a few steps. Follow these steps to initiate a DeskDock connection between your devices.
- Find a place for your Android device on your desk. You can use a stand or mobile phone holder to achieve a stable position.
- Enable USB debugging on your Android device. Here is a very good article from Android that can help you enable USB debugging on your device.
- Connect your device to PC via USB cable. Allow on the USB debugging popup on your Android device.
- Download DeskDockServer on Windows and extract its contents inside a folder. Run DeskDockServer Executable.
- Install DeskDock Free on your Android device from Google Play Store. Open the application and grant all permissions as requested.
- Now inside the DeskDock application, go to Status tab and click on Connect button. The devices will be now connected.

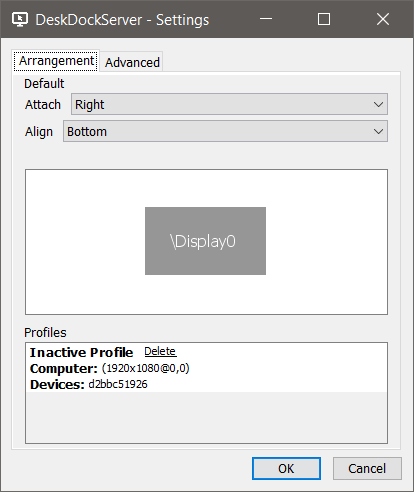
To check the status of the connection, click on the DeskDock icon in the system tray. It will tell you how many devices are available and how many are connected. Also, you can open DeskDock Settings and define your device’s arrangement. If you placed your Android Device on left to your PC, you can create a similar arrangement inside settings. Once everything has been configured and running, you can start using DeskDock features.
Just start dragging the mouse out of your computer screen and the pointer will be visible on the Android. You can use your computer’s mouse/trackpad to move the pointer around and use your Android device easily from a distance. You can perform clicks, scroll or navigate the pointer. Keyboard support is not available in free variant and you might have to purchase the pro version to use that feature.
There are a few more settings that you can configure, they are available inside the Advanced tab in DeskDockServer settings. Also, this tool can be used wirelessly if you know how to set up wireless USB debugging using ADB.
DeskDock is a great utility that lets you use both of your devices seamlessly. The setup can be easily achieved, and it integrates well. The tool is free and has most of the essential features. But if you are looking for keyboard support and other shortcuts, consider upgrading.
You can download DeskDock from its homepage.


