![]()
![]() If you accidentally sent a file to the Trash can on a Mac, you can undo that file or multiple files movement into the Trash with one of two easy tricks to essentially undo that file action.
If you accidentally sent a file to the Trash can on a Mac, you can undo that file or multiple files movement into the Trash with one of two easy tricks to essentially undo that file action.
You can use either method below to accomplish this, with the “Undo” command working if the trash action was the most recent, otherwise you’d want to rely on the “Put Back” method to restore a files location and undo the Trash move.
Try the “Undo” Command to Move a File From Trash in Mac OS X
The first to try is a simple Mac keyboard shortcut for Undo, Command + Z, this works to “Undo” the file trashing if it just happened and was the most recent action on the Mac.
For example, if you just now put a file in the Trash, hit Command+Z and it will “Undo” it and move the file back out of the Trash.
But the Undo command only works if it was the last activity, so if the file was sent to the Trash a while ago you can use the Put Back trick instead.
How to Use “Put Back” to Undo an Accidentally Trashed File on the Mac
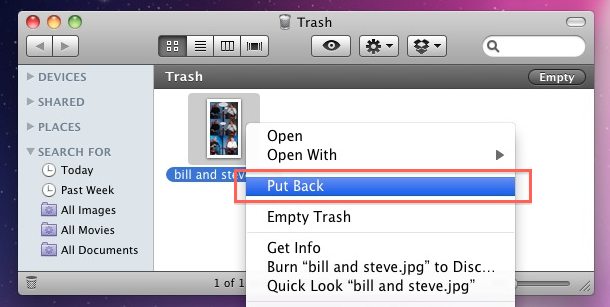
The Put Back command returns the file(s) to their location in Mac OS X Finder prior to deletion. This only works if the file is located in the Trash, not if the Trash has been emptied.
- Open the Trash can
- Select the file(s) you want to put back in their original location
- Right-click on the file(s)
- Choose “Put Back” to send the file to its original location within the Finder


You can also do this with a keyboard shortcut from the Trash can.
Select the files within the Trash and hit Command+Delete and it will also move them back to their original location before they were sent to Trash.
You may recall that Command+Delete normally sends files to the Trash from within the Finder, but if you’re within the Trash and a file in that Trash folder is selected, the functionality is reversed.
Follow Me:
Top Best Sellers!!


